|
||||
|---|---|---|---|---|
| Discoverable | Yes | |||
| Zone | ||||
| Eastern Wrothgar, Wrothgar | ||||
| Location | ||||
| Pocket realm of Oblivion accessed from northeast Wrothgar | ||||
| Solo Instance |
||||
| Solo Only | Yes | |||
| Loading Screen | ||||
 Untold thousands have tested their mettle against Maelstrom Arena―and failed.
|
||||

Maelstrom Arena is an otherworldly solo arena accessed from Wrothgar. Created by the Demiprince Fa-Nuit-Hen, it serves as a solo trial where one must defeat waves of enemies and bosses in nine different arenas.
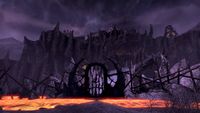
The entrance is found inside a small abandoned Orcish fort, complete with a set of stables and sealed well on the outside, and a number of hallways carved inside the mountain past the gate. The lower hallways are made up of jail cells, with a hole in the wall leading to a small cave containing the Daedric portal to the Maelstrom Arena.
When you first enter the realm, you will find yourself at a small Redguard-style manor in an Alik'r-like desert, surrounded by a circular wall of large rocks. Accepting the quest from Fa-Nuit-Hen will allow you to enter a portal and begin the trial.
Fa-Nuit-Hen and his Daedric subordinates will be spectating the games from the sidelines, and his assistant Tutor Riparius functions as a merchant between arenas. Each wave will have new sigils of defense, haste, healing, and power spawn, which can be used as temporary buffs. Once an arena is completed, one will be rewarded with a chest containing rewards and the option of traveling to the next arena.
New arenas progressively become more difficult, and completing the final arena grants a Maelstrom Weapon; completing the arena on veteran difficulty grants a Perfected Maelstrom Weapon.
Related QuestsEdit
- Maelstrom Arena Objective: Survive the Maelstrom Arena. / You survived the dangers of the Maelstrom Arena.
 Maelstrom Arena: Compete in an otherworldly Daedric arena.
PeopleEdit
|
WalkthroughEdit
Round 1: Vale of the SurrealEdit

An arena themed after the Shivering Isles. The environmental hazards here are a blue orb that chases you around doing minor magic damage within a small radius as indicated by a red circle. You have to keep moving to avoid this. The water around the tree in the center also applies a heavy snare, so avoid it. Here you'll face various Daedric and undead enemies, such as:
- Various Dark Seducers (Darkbow, Knight, Darkfire)
- Clannfear
- Scamps
- Bone Colossi
- Flesh Atronachs
- Daedroths
- Maxus Elementalists and Militants
The final boss of this arena is a Golden Saint named Maxus the Many.
Round 2: Seht's BalconyEdit

An arena themed after the Clockwork City built by Sotha Sil (also known as Seht), set under a clockwork sky. The environmental hazards here are a series of 6 spinning blades that run on 3 tracks across the arena. Getting hit by one will do moderate damage and apply a moderate bleed over time. The center pylon is electrified and standing near it will cause minor electric damage over time. If you stay in the center for too long, the pylon will explode throwing you out towards the edges of the arena, and possibly into a spinning blade. Hitting a switch located at the side of the arena will stop the blades from moving. It will also cause the pylon in the center to emit a healing aura (note that it will also heal any enemies that stand in it). The enemies here are primarily Dwemer constructs, such as
The boss of this arena is a trio of Dwarven Centurions, each named Centurion Champion.
Round 3: Drome of Toxic ShockEdit

This arena resembles an Argonian village in Murkmire. The hazard here is the water around the three islands, which the Queen will randomly electrify throughout the fight. If the Stranglers pull you into the electrified water, you'll take heavy electric damage over time. Kill the Stranglers quickly to avoid this. The Lamia Queen will also periodically spit poison from her perch above the arena, dealing moderate poison damage in AoEs.
Here you'll face off against Argonians, Lamia and other swamp-dwelling creatures like:
- Various Argonians (Warrior, Brute and Summoner Thralls)
- Lamias (Lamia Curare, Lamia Domina, and Spectral Lamia)
- Giant Snakes
- Stranglers
- Queen's Pet, a wamasu.
- Queen's Champion, an Argonian
- Queen's Advisor, a hag.
The boss of this round is the leader of the lamia, aptly named the Lamia Queen.
Round 4: Seht's FlywheelEdit

This round brings you back to the Clockwork City, but now in a chamber deep underground. The enemies are now a mix of Dwemer constructs and scavengers, such as
- Dwarven Spiders
- Dwarven Spheres
- Clockwork Sentries
- Various Scavengers (Fire Mages, Ravagers, Overchargers, Healers, Thunder-Smiths)
- Achelir, the boss of wave 1. He is a Redguard scavenger who uses flame magic.
- Aihrima, the boss of wave 2. She is a Khajiit scavenger who uses shock magic.
- Kothheid, the boss of wave 3. He is a Nord scavenger who uses melee and flame magic.
The final boss is a giant Dwarven Spider named The Control Guardian.
Round 5: Rink of Frozen BloodEdit

This arena is themed after the Wrothgarian Mountains. The arena is filled with frozen water that will damage you if you stand in it. Stay on the three ice platforms to avoid this. The enemies here include:
- Various Huntsmen—chillbanes, frostbiters, and heartfinders
- Troll Breaker, trolls who will not attack you but instead try to break the platforms
- Ogres
- Deathless Wolves, seemingly undead wolves that are summoned by the huntsmen
- Leimenids and Leimenid Oracles, ghostly Nereids
- Frost Atronachs
- Auroral Guardians, spectral bears
- Angirgoth, a female huntsman who is the boss of wave 1
- Ogre Elder, an ogre mage that is the boss of wave 2
- Aki and Vigi, two giants encountered in wave 3
- Bor, a giant who is the boss of wave 3
The final boss is a giant named Matriarch Runa
Round 6: Spiral ShadowsEdit

This arena is themed after Mephala's realm - the Spiral Skein. Here, five obelisks will emit a glow that repels spider swarms, but these obelisks may be covered with webs spun by enemies. To remove them, you have to kill a Venomous Hoarvor near them, causing them to explode with acid. Alternatively, if a hoarvor is not killed near an obelisk, it will leave behind an acid sac. That sac can be thrown (using a synergy) at webbed obelisks to free them. If all 5 obelisks are freed, they will stun all enemies (including bosses) for 10 seconds, before being covered in webs again. Freeing the obelisks is necessary during the final boss fight, as each obelisk left covered will increase her damage done. The enemies faced are various Spiderkith and insects, such as:
- Various Spiderkith (Wefter, Berserker, Venifex, Enervator)
- Dire Wasps
- Dread Scorpions
- Flesh Atronachs
- Spiderlings, which can be driven away by drawing them near a glowing obelisk
- Webspinners
- Venomous Hoarvors, which have to be killed near the obelisks to dissolve any webs covering them.
- Void Lurchers
- Spiderkith Captain, the boss of wave 3.
- Xivilai Toxicoli, the boss of wave 4.
The final boss is a Spider Daedra named Champion of Atrocity.
Round 7: Vault of UmbrageEdit

This arena is themed after an Ayleid ruin in Murkmire. The environmental hazards here are poisonous plants that will explode when you go too near, or if they are forced to explode by the Argonian Venomcallers. The only way to cleanse the poison is to stand in the green pools on either side of the arena. The Minders during the boss fight also create areas of protection to stand in during its ultimate attack. The enemies encountered here are
- Various Argonians: (Berserkers, Minders, Venomshots, and Venomcallers)
- Feral Argonians
- Nix-Hounds
- Swamp Trolls
- Wamasu
The boss of this arena is the Argonian Behemoth.
Round 8: Igneous CisternEdit

This arena takes place in a volcanic cavern deep underground. The environmental hazards here are frequent lava eruptions that will land on the arena, as indicated by red circles. There are also 3 Warding Stones that have to be broken occasionally, as any enemies indicated with a blue glow will be immune to damage until all stones are broken. The enemies faced here are:
- Various Dremora (Caitiff, Kyngald, Gandrakyn)
- Flame Atronachs
- Shalks
- Infernal Destoyers, fiery lurchers
- Flame Knight, a Xivilai which is the boss of wave 4.
The final boss is a Dremora named Valkyn Tephra.
Round 9: Theater of DespairEdit

The Theater of Despair is the final round of the arena, and is supposedly based on Mehrunes Dagon's Deadlands. The hazards here are blue wraiths that float across the arena. Touching one will cause cold damage and slow, while touching a golden one provides a boost to your defenses. Touching 3 golden wraiths will allow you to cast the "Spectral Explosion" synergy, that removes all wraiths and stuns all enemies for 10 seconds (including bosses). Additionally, some Dremora will empower a rune in the center of the arena, which will eventually cause a giant Bone Colossus to spawn. The enemies are:
- Animus Crystal
- Bone Colossus
- Clannfear
- Crematorial Guard
- Ogrim
- Xivilai Ravager, the boss of wave 3.
- Ash Titan, a Daedric Titan which is the boss of wave 5.
The final boss of the arena is a Xivkyn named Voriak Solkyn.
BooksEdit
- A Memory Book, Part 1 by Fa-Nuit-Hen — The recollections of a Daedric Demiprince
- A Memory Book, Part 2 by Fa-Nuit-Hen — The recollections of a Daedric Demiprince
- A Memory Book, Part 3 by Fa-Nuit-Hen — The recollections of a Daedric Demiprince
- Vorgrosh Rot-Tusk's Guide to Dirty Fighting by Vorgrosh Rot-Tusk — An Orcish guide to combat
SetsEdit
The following sets can be found in the reward chest at the end of each Maelstrom Arena round:
| Set Name | Bonuses | Set Type |
|---|---|---|
| Elemental Succession |
2 items: Adds 25-1096 Maximum Magicka |
Light Armor |
| Glorious Defender |
2 items: Adds 28-1206 Maximum Health |
Heavy Armor |
| Hunt Leader |
2 items: Adds 25-1096 Maximum Stamina |
Medium Armor |
| Para Bellum |
2 items: Adds 25-1096 Maximum Stamina |
Medium Armor |
| Permafrost |
2 items: Adds 28-1206 Maximum Health |
Heavy Armor |
| Winterborn |
2 items: Adds 25-1096 Maximum Magicka |
Light Armor |
- Normal weapons can drop from the last boss of the Arena on normal difficulty.
- The Perfected versions of the weapons only drop in Veteran Mode or can be awarded to players who successfully rank on the weekly Arena leaderboard.
| Set Name | Bonuses | Set Type |
|---|---|---|
| Crushing Wall |
2 items: Increases the damage Wall of Elements deals by 29-1250. |
Weapon |
| Perfected Crushing Wall |
2 perfected items: Adds 27-1190 Offensive Penetration |
Weapon |
| Cruel Flurry |
2 items: When you deal damage with Flurry, your single target damage over time abilities used within 4 seconds gain 39-1690 Weapon and Spell Damage. |
Weapon |
| Perfected Cruel Flurry |
2 perfected items: Adds 2-103 Weapon and Spell Damage |
Weapon |
| Merciless Charge |
2 items: Activating Critical Charge stirs up a barbarous lust for battle within you for 18 seconds, increasing your damage done with direct damage attacks by 1%, up to a maximum of 12%. This effect scales off the higher of your Weapon and Spell Damage. |
Weapon |
| Perfected Merciless Charge |
2 perfected items: Adds 27-1190 Offensive Penetration |
Weapon |
| Precise Regeneration |
2 items: When your Regeneration critically strikes, you restore 12-558 Magicka. This effect cannot occur from simultaneous critical strikes. |
Weapon |
| Perfected Precise Regeneration |
2 perfected items: Adds 12-526 Critical Chance |
Weapon |
| Rampaging Slash |
2 items: When you deal damage with Low Slash, your next fully-charged Heavy Attack used within 5 seconds restores 44-1904 Magicka and Stamina. |
Weapon |
| Perfected Rampaging Slash |
2 perfected items: Adds 1-77 Magicka Recovery |
Weapon |
| Thunderous Volley |
2 items: Increases the damage Volley deals by 10-430 each tick. This bonus increases by 4-191 every time Volley ticks, up to a maximum of 8 times. |
Weapon |
| Perfected Thunderous Volley |
2 perfected items: Adds 12-526 Critical Chance |
Weapon |
AchievementsEdit
There are three achievements associated with this location:
| Achievement | Points | Description | Reward | |
|---|---|---|---|---|
| Maelstrom Arena Champion | 15 | Conquer all challengers and earn the title of Maelstrom Arena Champion. | Title: Maelstrom Arena Champion Trophy: Argonian Behemoth (page) |
|
| Veteran | ||||
| Maelstrom Arena Conqueror | 50 | Conquer all challengers in Veteran Maelstrom Arena. | Title: Stormproof Maelstrom Baron Polymorph Bust: Argonian Behemoth (page) |
|
| Maelstrom Arena: Perfect Run | 50 | Complete Veteran Maelstrom Arena in a single attempt, without dying or leaving the arena. | Title: The Flawless Conqueror | |
GalleryEdit
-
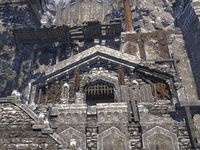
Entrance to the Maelstrom, seen in Wrothgar
-
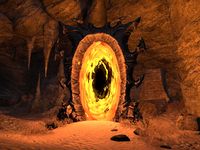
Portal to the Arena from Wrothgar
-
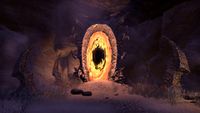
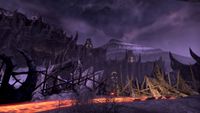
The other end of the portal, seen from the Maelstrom side
-
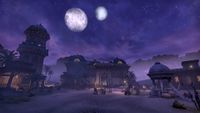
Maelstrom Arena
-

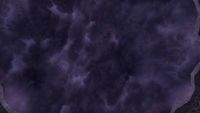
The sky in Maelstrom Arena
-
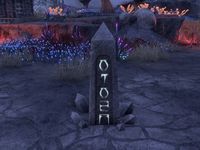
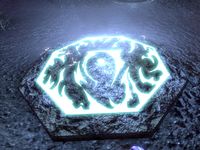
An obelisk
-
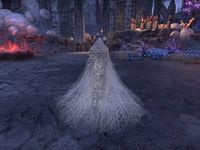
An obelisk covered in webs
-
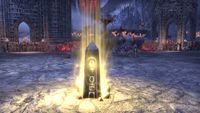
A glowing obelisk
-
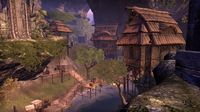
Vault of Umbrage
-
Theater of Despair
-
Theater of Despair
-
The sky in the Theater of Despair
-
A rune that sends you up to the second level in the Theater of Despair
-

Chest of Champions, identical to the one in Dragonstar Arena
-
Septim coins inside the starting area


.jpg)
NotesEdit
- The Maelstrom Arena was originally supposed to have 10 arenas (hence why the tenth bust in the starting area uses a Baron in place of an arena boss), as the cut Skein Grotto would have been visited somewhere in the middle. As the name suggests, it would've been themed after the Spiral Skein and complimented the Spiral Shadows arena in a similar manner to how Seht's Balcony contrasts with Seht's Flywheel.
- Prior to an unknown patch, the spectators seen and heard commenting on the fights in the arena stages could all be found on the arena grounds upon first arriving. However, this is no longer the case.