|
||||
|---|---|---|---|---|
| Group Dungeon | ||||
| Discoverable | Yes | |||
| Completion | Objective | |||
| Dungeon | Yes | |||
| # of Zones | 1 | |||
| Zone | ||||
| Reticulated Spine, Shadowfen | ||||
| Location | ||||
| West of Stormhold | ||||
| Instanced Dungeon | ||||
| Min Level | 45 | |||
| Group Size | 4 | |||
| Bosses | 4 | |||
| Veteran Speed Run Target | 30 mins | |||
| Loading Screen | ||||
 As any Argonian will tell you, something at the heart of the "Puzzle City" is terribly wrong and deeply disturbing at a basic, almost organic level. Erect the spines of warning!
|
||||

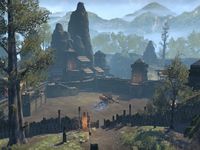
Ruins of Mazzatun is a group dungeon in Shadowfen.
It's part of the Shadows of the Hist dungeon pack DLC, along with Cradle of Shadows. The ruins can be entered from a cave at Hei-Halai, west of Stormhold. The entrance to Cold-Blood Cavern lies beneath a trap door in the tunnel leading to Mazzatun's entrance. Pages from the Mazzatun Style and a lead for the Bog-Blue Jasper Fetish (required for the Harpooner's Wading Kilt) have a chance to drop from the last boss.
Similar to the Imperial City group dungeons, Mazzatun has an objective quest as well as a repeatable pledge from Urgarlag Chief-bane. Hist Ponds serve as traps in this dungeon. Monkeys and frogs can be found throughout the dungeon. Its dungeon sets are Amber Plasm, Aspect of Mazzatun, and Heem-Jas' Retribution.
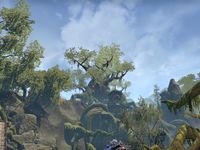
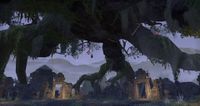
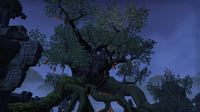
The Ruins of Mazzatun make up an ancient Argonian city inhabited by the Xit-Xaht Tribe. The Xit-Xaht have an affinity for the stone and the roots, and have recently taken to raiding other villages and enslaving the inhabitants. Those they capture are put to work, being forced to construct the sprawling city of Mazzatun. The city's construction doesn't entirely make sense; there are hallways leading nowhere and staircases that climb up to dead end walls. Aptly nicknamed the "Puzzle City", the ruins of old Mazzatun are like a sprawling maze.

Backstory DescriptionEdit
- Update 11 Patch Notes
Venture into Mazzatun, the "Puzzle City" of the Xit-Xaht tribe of Argonians, who have been forcing other Lizardfolk to work as slave labor on a project that has driven their masters … mad! Can you free them in time?
Related QuestsEdit
- Ruins of Mazzatun Objective: Explore the Ruins of Mazzatun. / You ended the Xit-Xaht threat in the Ruins of Mazzatun.
 Sap and Stone: Eliminate the Xit-Xaht threat in the Ruins of Mazzatun.

 Pledge: Ruins of Mazzatun: Prove you are truly Undaunted by conquering the Ruins of Mazzatun.
-
Ruins of Mazzatun Pledge: Prove you are truly Undaunted by conquering the Ruins of Mazzatun.(disabled since Patch 2.6.4)
CharactersEdit
|
EnemiesEdit
Normal EnemiesEdit
- Argonian Shellbinder
- Argonian Wrangler
- Kotu Gava
- Kotu Gava Broodmother
- Mudcrab
- Siphoning Totem
- Xit-Xaht Drudge
- Xit-Xaht Lookout
- Xit-Xaht Overseer
- Xit-Xaht Root-Mason
- Xit-Xaht Stoneshaper
- Xit-Xaht Thunderscale
- Xit-Xaht Trapper
Elite EnemiesEdit
Champion EnemiesEdit
MinibossesEdit
- Zatzu, an Argonian slavedriver
BossesEdit
- Mighty Chudan, the Tree-Minder's giant Haj Mota pet
- Xal-Nur the Slaver, a monstrous Argonian Behemoth
- Tree-Minder Na-Kesh, the leader of the Xit-Xaht tribe, performing cruel alchemical experiments with amber plasm
Hard ModeEdit
Hard Mode is only available in the Veteran version of Ruins of Mazzatun. Hard mode is initiated by destroying Tree-Minder Na-Kesh's Notes on the Amber Plasm.
- <This scroll contains notes about handling the Amber Plasm. Destroying these notes will make it much more difficult for Na-Kesh to create more. This will probably enrage her.>
- <Destroy the notes.>
Destroying the notes will cause a blinding flash of light and will make the boss fight more difficult. For full details of the changes, see Hard Mode Mechanics below. If your group dies, the notes will need to be burned again to re-enable Hard Mode.
Boss MechanicsEdit
ZatzuEdit
- Barrage of Stone: Zatzu lifts her weapon into the air and flings boulders at each person in the group. This ability needs to be blocked, or else it will knock you down. The Stoneshapers in the rest of the dungeon also use this ability.
- Leap: Zatzu will leap into the air and land in an aoe circle, knocking back whoever is standing in the circle. Stay out of the aoe.
Mighty ChudanEdit

- Mucous Spray: Chudan barrages whoever she's targeting with a flurry of poisonous spit. It hits numerous times and deals poison damage. This should be blocked to reduce the incoming damage.
- Bog Rush: Chudan targets one player and digs towards them when an Argonian Shellbinder spawns. The Shellbinder prods Chudan with lightning in an attempt to control the beast, throwing shock spells at your group in the process and dealing increasing amounts of damage the longer the Shellbinder is left alive. The indication that you have been targeted comes to you in the form of an AoE that spreads out from beneath your feet and follows you. When targeted, a group member must run between Chudan and the Shellbinder when Chudan digs towards you so she kills the Shellbinder that's tossing out lightning. Once Chudan begins to charge, she will dig in a straight line without deviating from that path. Targeted individuals should move themselves in position and roll dodge or sprint out of the way when Chudan begins to dig underground.
Xal-Nur the SlaverEdit
- Monstrous Blitz: When Xal-Nur blitzes, he charges with an unrelenting focus. His blitz can be blocked by players who step in the way.

- Swamp Spice: Xal-Nur is invulnerable during Swamp Spice phase. The on-screen tell for this reads, The aroma of Swamp Spice invades the arena! At certain health intervals (75%, 50% and 25%), Xal-Nur will spit Swamp Spice. Adds are attracted to the smell of swamp spice, and will swarm the arena. The swamp spice needs to be cleansed to continue the fight and can be done by a player running into the spice's green AoE, then running to the active geyser to cleanse it in. A geyser can either spawn behind where Xal-Nur stands when idle (exit-side), or to the right of the entrance door. The geyser that activates will be on the opposite side of the arena to where the Swamp Spice lands. Being drenched in Swamp Spice will slow the player, the spice can be dropped using the synergy key and will return to the ground beneath the player.
- Strategy: It may be a good idea for the spice runners to have a speed-boosting ability on their bar, and for the healer keep an eye on the spice runner's health. If you're being overwhelmed by adds, kill one of the Argonian Wranglers holding the chained wamasu.
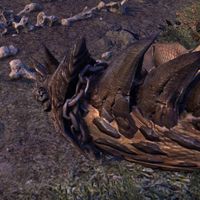
- Wamasu: There are three wamasu around the arena chained by Argonian Wranglers. Killing one of the Argonian Wranglers will release its wamasu. The wamasu will then kill adds around the arena until it is killed by Xal-Nur. Any wamasu you don't free during the fight will survive. After the battle, if there are any wamasu left alive, they will wander around the arena, then lay down and fall asleep.
Tree-Minder Na-KeshEdit
- Hist Pool: Occasionally, Na-Kesh throws a glob of Amber onto the ground that creates a Hist Pool, which adds can run into. This empowers the adds. Once the pool is stepped in, it disappears. A player can run onto the Hist pool to remove it, but will also receive a DoT effect for a short duration. This damage is not as severe as the damage dealt by the Hist Ponds scattered throughout the rest of the dungeon, and can be healed through fairly easily. It is important to watch out for this mechanic on hardmode.
- Totems: Na-Kesh summons a Siphoning Totem that drains your magicka and stamina rapidly, and your health at an increasing pace. The totem must be killed as quickly as possible, or the group will run out of resources.
- Amber Projection: Na-Kesh will summon an amber shade of Mighty Chudan at 75% health and Xal-Nur at 50%. Na-Kesh becomes invulnerable at this time, and cannot be damaged until the shade is defeated.
- Hist Hallucinations: The Tree-Minder targets one player and throws Amber at them, causing them to hallucinate. This makes the statues on the edge of the arena glow and the affected player's vision go wonky. The affected player will be able to see Avatars of the Hist all around the edge of the arena in place of statues, and must be guided to destroy the totem. The affected player will be unable to use their weapons, and all the skills on their ability bar will be replaced by a single skill, which they will use to destroy the totem. The affected player must find the Empowered Tree-Minder Totem and destroy it. The real totem glows for group members who aren't hallucinating. Group members can activate a synergy to reveal the real avatar on normal, but on veteran hard mode the synergy is disabled.
- Strategy: Group members targeted by hallucinations are effectively incapacitated until the totems are brought down, so it would be ideal for the group to come up with a way to communicate where the glowing totem is without the synergy. One strategy (without using voice communications) is for the tank to pull the boss over to the real totem so the affected player can follow the group to their target.
- Execute Phase
- At 25% health, Na-Kesh enters execute phase, wherein she causes vines to erupt in all directions in an alternating pattern, with spaces between the conic aoes that sprout up. Na-Kesh can still summon Siphoning Totems and throw Sap at a player to cause Hist Hallucinations during this phase.
Hard Mode MechanicsEdit
During hard mode, Tree-Minder Na-Kesh will summon adds in greater numbers. The synergy to reveal the Empowered Tree Minder Totem is disabled.
Some things your group might want to consider during hard mode:
- If an Amber Projection is spawned, it may be wise to kill the adds before slaying the phantom, lest you risk having a group member hallucinate or a Siphoning Totem spawn at an inopportune time (i.e.; when you're swamped with adds), effectively ending the fight.
- Do not let the adds step into the Hist Ponds. The DoT applied by the thrown amber plasm isn't as harsh as the damage over time dealt by the Hist Pools scattered throughout the rest of the dungeon, and is very easily healed through, so having a player take the DoT is advised. Damaging the extra enemies will be a far swifter task if they're not allowed to strengthen themselves with Na-Kesh's plasm.
- A Stoneshaper being empowered by Amber Plasm can ruin the fight if you're not careful. The tank should pull the Stoneshapers towards the boss to make it easier for the group to burn them down.
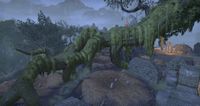
LayoutEdit
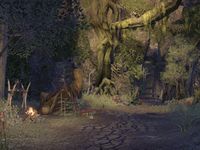
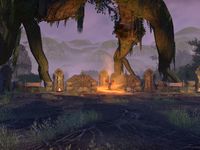
Fields of MazzatunEdit

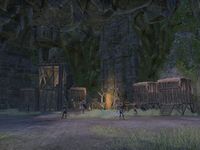
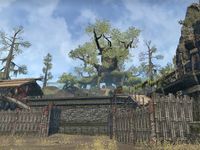
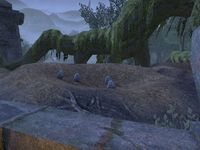
The Fields of Mazzatun make up the city's entrance. It is a linear field leading into the xanmeer. There is one Xit-Xaht Sludge-Slinger near the Hist pool at the bend in the road. You can easily avoid it by sticking to the left side of the road. Zatzu the Spinebreaker is at the top of the stairs, guarding the entrance to the stone city of Mazzatun.
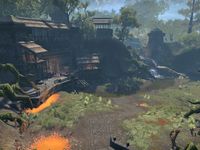
Sap PoolsEdit
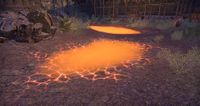
The glowing orange pools of viscous liquid you see scattered throughout the exterior portions of the dungeon are formally called Hist Ponds, though they may be simply referred to as "the sap" or "sap pools" by members of your group. Standing in them applies an aesthetic effect called Hist Sickness, which covers your character in a glowing orange substance. It also applies Blistering Amber, which deals damage over time that persists for several seconds when you are not standing in the pond. This damage can be debilitating on Veteran mode. Try not to stand in the Hist Ponds, and if you have to run through one, try to heal yourself or ask your healer to focus a few heals on you while you're suffering from the pool's DoT.
The Hist Ponds empower the Xit-Xaht Sludge-Slingers that stand in them.
Sludge-SlingersEdit
Xit-Xaht Sludge-Slingers are exclusively male shirtless Argonians daubed in glowing, orange sap. They are usually standing in the orange Hist Ponds. When they stand in a Hist Pond for long enough, they will become enraged, glowing red. The Sludge-Slingers have two abilities your group needs to look out for:
- Sludge Toss: The Sludge-Slinger throws Blistering Amber at a group member, which applies a very painful bout of damage over time onto whoever it hits. This ability can be interrupted, and it should be by whoever is close to the Sludge-Slinger. Try to avoid allowing the Sludge-Slingers to fling gobs of sap at your group members.
- Hist Toss: The Sludge-Slinger throws a puddle of sludge onto the ground, allowing one of its allies to run into the amber and become empowered, making their attacks stronger.
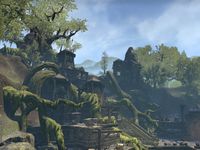
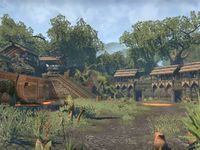
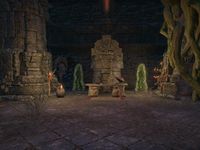
Inner Ruins of MazzatunEdit

A chest can be found in the northern section of the first tunnel beyond Zatzu. There are several groups of enemies in the next room. You must kill the Stoneshaper harassing Heem-Jas in order to enter the next area. The door will not open otherwise. The hallway beyond this room teaches you how Swamp Spice works.
StoneshapersEdit
Stoneshapers are Xit-Xaht wearing heavy armor, bearing maces and shields. They need to be held by the tank, as they hit hard. Stoneshapers use their magic to throw rocks at members of the group in combat; this ability needs to be bashed by the tank, or blocked by the group members if it is allowed to be cast. These enemies will give your group a hard time on veteran.
Swamp SpiceEdit
There is a group of hostile blue mudcrabs surrounding a green AoE, which is sat upon the ground at the base of the stairs. Standing in the AoE causes one to pick up the Swamp Spice. The mudcrabs will attack whoever is carrying the spice, and eventually, the spice will slow the carrier down exponentially. The carrier will be prompted to shake off the spice with a Synergy. The spice needs to be carried to the geyser at the top of the stairs, where the carrier can clean themselves off. Once the spice is washed away, the mudcrabs will dig away, exiting combat.
This is intended to teach you a mechanic for the fight against Xal-Nur the Slaver, the dungeon's third boss. Swamp Spice will feature heavily during that battle, so if any of your groupmates are new to the dungeon, try to allow the newbie to carry the spice up the stairs to practice this mechanic. It would be helpful to kill the mudcrabs for them so they can focus on learning how the spice works rather than worrying about the damage they're taking from the crabs.
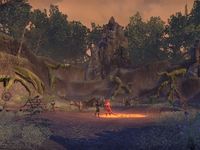
The Chudan CorralEdit
The Chudan Corral is a large, open area where Tree-Minder Na-Kesh's giant haj mota pet, Mighty Chudan is kept. Chudan must be defeated in order for the group to move on. There are two Xit-Xaht Sludge-Slingers in the courtyard beyond Mighty Chudan's corral. You can easily sneak past the enemies here.
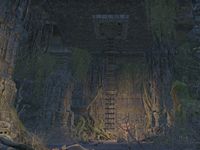
The Deep MazeEdit
You must navigate the maze to get to the next portion of the dungeon. There are enemies in every chamber. Navigating to the exit is a relatively simple affair. At the first fork in the road, take the path on the right-hand side (east on the map). Kill the enemies in the chamber and head through the path to the west. You're going to go north from this turn. When the path splits, take the northern tunnel, and you'll be home free; there are no more confusing corridors to navigate the way you needed to navigate the Deep Maze.
A Farewell Note can be found in the twisting tunnels of the Deep Maze. At the first bend, go down the hallway leading left.
The Deep Maze CourtyardEdit
Here, you will face several waves of enemies, including archers, foot soldiers, stoneshapers, storm mages, root masons and haj mota. The way forward will be blocked until all the enemies are dead. The Deep Maze Egress is the tunnel leading out to the next section: the Root-River Walk. Within the tunnel, you'll have another opportunity to practice the swamp spice mechanic.
The Root-River WalkEdit
One Xit-Xaht Sludge-Slinger is located at the beginning of the area. An Urgent Letter lies on the bank above the river to the left, past the bridge. Swamp Trolls feast on the corpses of dead Xit-Xaht tribesmen, and blue mudcrabs loiter along the edges of the hist pools.
Stone Stockade CourtyardEdit
There are two Xit-Xaht Sludge-Slingers here. Most groups will not be able to get to the door up the stairs without killing the enemies in the courtyard.
The Stone StockadeEdit
Xal-Nur the Slaver resides here. In each corner of the arena, there is an Argonian Wrangler holding a wamasu on a chain. These wamasu can assist you during battle if things get hectic. All you need to do is kill their handlers.
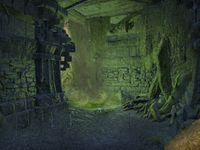
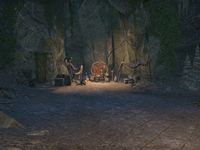
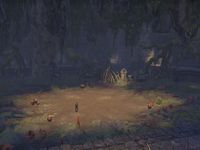
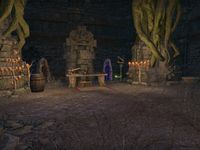
Ritual ChamberEdit
.jpg)

Several containers and provisioning ingredients can be looted here. There are coin piles on the tables in this room. Na-Kesh's Journal lies atop a table near the entrance, to the east. The puzzle in this chamber is your last barrier before fighting Na-Kesh.
The Calendar PuzzleEdit
Six of the Su-Zahleel elders have been set in cages around the edge of the room. There are buttons on the daises in front of their cages. A large calendar sits on the ground in the middle of the room. There are symbols along the calendar's edge. One of the calendar's symbols will glow (as will the buttons in front of the elders), and you need to press the button that has the corresponding symbol. After a button is pressed, Xit-Xaht tribesmen will appear from behind the vines along the walls and attack you. If a group member messes up the puzzle at any stage, an elder will be drenched in amber plasm. If this happens, the elder you've doomed will go mad and attack the group with the rest of the adds. Pressing the correct button (the one that has the same symbol as the one currently glowing on the floor) allows the elder to walk away free from harm.
The order of the symbols that must be followed is always the same. The order is Shaja-Nushmeeko (Dancing Lizard), Hist-Deek (Little Tree), Hist-Tsoko (Biggest Tree), Thtithil (Egg, looks like a Ladybug to some), Xulomaht (Grave Stake, described as a Pencil by some), Xeech (Seed; can be described as a Leaf Boat to those who don't see a seed). The buttons these symbols are on are randomized. For example, Lizard could be set on Naheesh Veesum at the entrance one run, and Naheesh Naxaltan on exit side the next.
There is no "real" consequence to allowing all six of the elders to die in normal mode, save for the fact that the elders you don't rescue won't be present at the end of the quest. An achievement, Savior of the Su-Zahleel, can be earned in this room on Veteran mode.
The Mad Hist's SummitEdit
The Summit Approach is the hallway leading up to the Mad Hist's Summit. The Hist is sat above the mountain's summit. You will fight Tree-Minder Na-Kesh here. Tree-Minder Na-Kesh's Amber Plasm notes are on a table near the door leading to her courtyard beneath the Hist.
BooksEdit
- Captive's Journal
- Farewell Note by Seesaus
- Na-Kesh's Journal by Tree-Minder Na-Kesh — Notes on the origin and properties of Amber Plasm
- Urgent Letter by Junal
SetsEdit
| Set Name | Bonuses | Location(s) | Set Type |
|---|---|---|---|
| Amber Plasm |
2 items: Adds 25-1096 Maximum Magicka |
Ruins of Mazzatun |
Light Armor |
| Heem-Jas' Retribution |
2 items: Adds 3-129 Stamina Recovery |
Ruins of Mazzatun |
Medium Armor |
| Aspect of Mazzatun |
2 items: Adds 28-1206 Maximum Health |
Ruins of Mazzatun |
Heavy Armor |
| Mighty Chudan |
1 item: Adds 34-1487 Armor |
Ruins of Mazzatun |
Monster Helm Sets |
AchievementsEdit
There are 19 Achievements associated with this dungeon:
| Achievement | Points | Description | Reward | |
|---|---|---|---|---|
| Shadows of the Hist Explorer | 5 | Enter either the Ruins of Mazzatun or the Cradle of Shadows for the first time. | Personality: Heroic | |
| Mazzatun Style Master | 50 | Learn every chapter in the Mazzatun style book, occasionally found as rewards for completing the Ruins of Mazzatun dungeon. | ||
| Needed for Ruins of Mazzatun Challenger | ||||
| Ruins of Mazzatun Challenger | 50 | Complete the listed achievements for Veteran Ruins of Mazzatun. | Skin: Amber Plasm | |
| Ruins of Mazzatun Conqueror | 10 | Defeat Zatzu the Spine-Breaker, the Mighty Chudan, Xal-Nur the Slaver, and Tree-Minder Na-Kesh in Veteran Ruins of Mazzatun. | Bust: The Mighty Chudan (page) | |
| Tree-Minder's Mania | 50 | In Veteran Ruins of Mazzatun, defeat Tree-Minder Na-Kesh after enraging her by destroying her alchemical notes on Amber Plasm. | ||
| Ruination | 50 | Defeat Zatzu the Spine-Breaker, the Mighty Chudan, Xal-Nur the Slaver, and Tree-Minder Na-Kesh in Veteran Ruins of Mazzatun within 30 minutes of starting the dungeon. Timer starts on passing through the first archway. | ||
| Unbowed | 50 | Defeat Zatzu the Spine-Breaker, the Mighty Chudan, Xal-Nur the Slaver, and Tree-Minder Na-Kesh in Veteran Ruins of Mazzatun without suffering a group member death. | ||
| Normal | ||||
| Ruins of Mazzatun Vanquisher | 10 | Defeat Zatzu the Spine-Breaker, the Mighty Chudan, Xal-Nur the Slaver, and Tree-Minder Na-Kesh in the Ruins of Mazzatun. | Trophy: The Mighty Chudan (page) | |
| Mazzatun Massacre | 10 | Defeat Tree-Minder Na-Kesh after first eliminating all other enemies in Ruins of Mazzatun. | ||
| Sapped Sludge Slingers | 10 | Complete Ruins of Mazzatun without ever allowing a Sludge Slinger to empower one of its allies with Amber Plasm. | ||
| Veteran | ||||
| Shadows of the Hist Delver | 50 | Complete Veteran Cradle of Shadows and Veteran Ruins of Mazzatun. | Title: Hist-Shadow | |
| Sludge-Slinger Slayer | 10 | Defeat 50 Xit-Xaht Sludge-Slingers in Veteran Ruins of Mazzatun. | ||
| Xit-Xaht Slayer | 10 | Defeat 600 members of the Xit-Xaht tribe in Veteran Ruins of Mazzatun. | ||
| Savior of the Su-Zahleel | 10 | Rescue all six of the Su-Zahleel Elders from the Ritual Chamber in Veteran Ruins of Mazzatun. | ||
| Haj Mota Matador | 10 | Defeat the Mighty Chudan in Veteran Ruins of Mazzatun without any party members being hit by Bog Rush. | ||
| Obedience Training | 10 | Defeat Xal-Nur the Slaver in Veteran Ruins of Mazzatun without unleashing any Wamasu to assist you. | ||
| Clean Freak | 10 | Defeat Xal-Nur the Slaver in Veteran Ruins of Mazzatun with only one party member cleansing the Swamp Spice. Other party members may still touch the Swamp Spice. | ||
| Blind Luck | 10 | Defeat Tree-Minder Na-Kesh in Veteran Ruins of Mazzatun without any party members using the Reveal synergy to identify the real Avatar of the Hist. | ||
| Sticky Situation Savvy | 10 | Defeat Tree-Minder Na-Kesh in Veteran Ruins of Mazzatun without any party members being struck by Blistering Amber. | ||
NotesEdit
- The text for having completed the objective dungeon used to be You put an end to the evil infecting the Ruins of Mazzatun. This was changed in one of the patches.
MapsEdit

Entrance
Door 1
Door 2
Door 3
Door 4
Door 5
Door 6
A map of the first area of the Ruins of Mazzatun
|

Door 1
Door 2
A map of the second area of the Ruins of Mazzatun
|

Door 3
Door 4
A map of the third area of the Ruins of Mazzatun
|

Door 5
Door 6
A map of the fourth area of the Ruins of Mazzatun
|
GalleryEdit
-

The area outside Mazzatun
-
View of the Hist from the Fields of Mazzatun
-
Fields of Mazzatun
-

Inner Ruins of Mazzatun
-
Inner Ruins of Mazzatun
-
Ruins of Mazzatun
-
The Chudan Corral
-
The Hist seen from the Chudan Corral
-
The courtyard beyond the Chudan Corral
-
The Deep Maze
-
The Deep Maze
-
The Deep Maze Courtyard
-
The Root-River Walk
-
Stone Stockade Courtyard
-
The Stone Stockade
-
Xal-Nur's wamasu after the battle
-
Sleeping wamasu at sunrise
-
Ritual Chamber
-
Ritual Chamber
-
Ritual Chamber
-
Summit Approach
-
The Mad Hist's Summit
-
Tsono-Xuhil's vast uxith
-
Beneath the mad Hist
-
Hist Ponds
-

Visual effect of Hist Sickness, caused by standing in Hist Ponds.
-
Xal-Nur's Wamasu have chains as collars
-
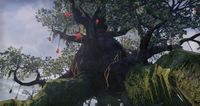
Mazzatun's uxith
-
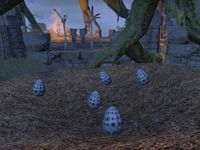
Xit-Xaht eggs
-
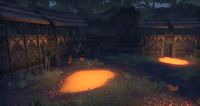
A pool of Amber Plasm
-
A view of the Hist from below
-
A view of the Hist
-
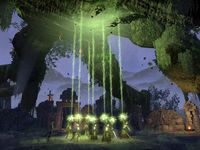
The Su-Zahleel elders attempt to heal the Hist


.jpg)
_02.jpg)


_02.jpg)

_02.jpg)
_03.jpg)
_04.jpg)


