|
||||
|---|---|---|---|---|
| Group Dungeon | ||||
| Discoverable | Yes | |||
| Completion | Objective | |||
| Dungeon | Yes | |||
| # of Zones | 1 | |||
| Zone | ||||
| Imperial City | ||||
| Location | ||||
| Northern Memorial District | ||||
| Instanced Dungeon | ||||
| Min Level | 45 | |||
| Group Size | 4 | |||
| Bosses | 3 | |||
| Mini-Bosses | 3 | |||
| Veteran Speed Run Target | 45 mins | |||
| Loading Screen | ||||
 This external district of the Imperial City houses the headquarters of the Imperial Legions, as well as the Imperial Prison itself. The City sewers pass beneath the prison as they drain toward Lake Rumare—but they're inaccessible, of course.
|
||||

The Imperial City Prison is a group dungeon found northeast of the Imperial City's Memorial District.
It has been overrun by Daedra, who have turned it into a place of torment and slaughter. A large Daedra carried on black wings has declared itself the new "Lord Warden" of the prison, and he has decreed that the prisoners must be tortured for the glory of Molag Bal. Mortals who die in captivity have their flesh taken to be used in the creation of biological weapons crafted by the vile Flesh Sculptor.
The dungeon sets found here are Leeching Plate, Scathing Mage, and Sheer Venom.
Backstory DescriptionEdit
The Imperial City was overrun some time ago. With its invasion, the prison was also abandoned by its once steadfast guards. In the chaos that resulted, gangs of prisoners fought and preyed upon each other—this lasted until the Daedra arrived to lord over the Imperial Prison. A Grievous Twilight and its minions have since completely taken over the prison. The Daedra capture mortals of all kinds from the Imperial City warzone and process them in the prison. Prisoners are sent deep underground, where the Daedra have unearthed a network of Ayleid ruins, converting them into holding pens and terrible torture chambers.
- Update 7 Patch Notes
Even before the Planemeld, this grim complex just outside the walls of the Imperial City was never the happiest site in Cyrodiil. Since Molag Bal ceded it to the worst of his Daedra, it's become a place out of a horrific nightmare.
Related QuestsEdit
- Imperial City Prison Objective: Explore the Imperial City Prison. / You braved the dangers of the Imperial City Prison.
 Summary Execution: Aid Lyranth on her path to vengeance, and liberate some lost souls along the way.

 Pledge: Imperial City Prison: Prove you are truly Undaunted by clearing Imperial City Prison.
-
Imperial City Prison Pledge: Prove you are truly Undaunted by clearing the Imperial City Prison.(disabled since Patch 2.6.4)
CharactersEdit
|
EnemiesEdit
Normal EnemiesEdit
- Bone Surge Totem (Veteran-only)
- Dread Daedrats
- Dremora Caitiffs, Ferylkyn, Invokers and Kynvals
- Inmates
- Mindshriven Bloodfiends, Foot Soldiers and Spellfiends
- Necrotic Hoarvor
- Shades
- Vigilant Watchers
- Xivkyn Berserkers and Necromancers
- Zombies
Elite EnemiesEdit
MinibossesEdit
- Overfiend, a mindshriven Imperial
- Gravelight Sentry, a watcher
- Lord-Warden's Council, a group of four xivkyn
BossesEdit
- Ibomez the Flesh Sculptor, a xivilai torturer
- Flesh Abomination, a massive armored flesh colossus
- Lord Warden Dusk, a large armored grievous twilight and master of the occupied prison
Hard ModeEdit
Hard Mode is only available in the Veteran version of Imperial City Prison. Hard mode is initiated by destroying the Warden's Tome.
- <There is an introduction to the warden's tome.>
"Actions beget consequences. The inmates shall pay for their crimes, endlessly. Here I record their pain so the final moments serve as example to all others who would travel the fruitless path." - <Burn the Warden's Tome>
Destroying the notes will cause a blinding flash of light and will make the boss fight more difficult. The Lord Warden deals more damage while Hard Mode is active. If your group dies, the tome will need to be burned again to re-enable Hard Mode.
Boss MechanicsEdit
OverfiendEdit
Some of the Overfiend's abilities are basic ranged and physical abilities, such as Slash and Entropic Flare.
At 50% health, the Overfiend will call for help and the Lord Warden will send a Harvester through the portal to attack the party. The Harvester is a high priority target and the tank should taunt both and hold them near each other so they can be burned down together as fast as possible. Using ultimates during this part of the fight is also recommended.
- Consuming Energy: The boss creates a purple ring on the ground around itself and a random player, briefly stunning all enemies it touches. This attack can be interrupted.
- Flurry: A close-range attack where the Overfiend slashes at one player dealing high amounts of damage over time in front of himself as indicated by a red cone. It is advised that the tank not move when this attack is performed as the boss will turn accordingly, which may cause other players to get hit. Entropic Flurry is a similar attack that does more damage.
- Summon Minions: As his health depletes, the Overfiend will summon Dremora Invokers, Dremora Ferylkyn, and Minshriven Footsoldiers to aid him. More minions are summoned the lower his health is. To avoid being overwhelmed, focus on AOE damage to cleave his minions down while damaging him. The Invokers are a priority as they will place damage shields on allies that reduce their damage taken significantly.
Ibomez the Flesh SculptorEdit

The center of the room contains a pool of green acid that does moderate poison damage over time to players inside it. Players should avoid standing in the pool if possible.
At the beginning of the fight, the Inmates standing in the center of the room will die, summoning a Flesh Atronach to attack the party. Like all atronachs summoned during this fight, it will enrage and wipe the group if players take to long to kill it, so DPS should kill it quickly. Throwing Flesh Grenades on the atronach will cause it to take more damage, this can help if many atronachs are up at once. Flesh Grenades are the lumps of green meat that spawn around the arena.
The boss will also summon Flesh Grenades throughout the room during the fight. These green blobs on the floor will explode after a while as indicated by a red circle, dealing minor poison damage as well as knocking back the player. These grenades can be thrown by players by standing near one and pressing the synergy button to aim and throw it. This is important for some of the other attacks the boss uses.
- Toxic Cleave: The boss releases a wave of poison from itself as indicated by a red cone dealing high poison damage. The tank should face the boss away from the team to prevent them from being hit. All flesh grenades hit by Toxic Cleave will also explode, potentially hindering players during later phases of the fight.
- Blight Bomb: The boss throws green blobs at all players in front of him, dealing minor poison damage over time.
- Tenderize: The boss fears the whole group, and then runs to and stuns a random player with an unbreakable stun. The boss then charges up a heavy swing which must be interrupted by a teammate. Failure to do so will lead to instant death for the victim (in veteran mode, this is guaranteed: in normal mode, a tank with high health may have a chance to survive).
- Summon Inmates: At 75%, 50%, and 25% health the boss will become invulnerable and run to the pool in the middle and summon inmates from the gates along the walls. The inmates will walk slowly to the acid pool in the center, and players will have to kill the inmates before they reach the pool and dissolve. If too many inmates reach the pool, a Flesh Atronach will be summoned to attack the party. Players have to throw the Flesh Grenades around the room on the inmates, which will kill them instantly, as they have too much health to kill them all in a timely manner using normal attacks. As stated previously, flesh atronachs will enrage if they are left alive for too long; they must be killed quickly. The tank should taunt the atronachs and bring them close to the boss so the damage dealers can kill them more swiftly.
Gravelight SentryEdit
The Gravelight Sentry is positioned on an island surrounded by Corrupt Water. The water is toxic and will deal high poison damage over time to players standing in it. When enraged, the Gravelight Sentry will summon blobs of poison from the water that will land at each player's location, dealing moderate poison damage and stunning them as indicated by red circles. Keep moving to avoid this. Do note that the stun from this attack and the frequency at which it is performed will make it almost impossible to resurrect any dead players once the boss is enraged, so be careful not to die here.
Several Xivkyn Necromancers are positioned around the island's perimeter.
- Gaze: The watcher shoots a beam from its eye directly at the player as a basic ranged attack. It does moderate magic damage.
- Doom-Truth's Gaze: The watcher winds up and releases a series of beams along the ground in front of it. Getting hit by one will do high magical damage to the player, and stun them briefly. The beams can be avoided by being behind the watcher when it is performing this attack.
- Shockwave: The boss spins around releasing a burst of magic as indicated by the large red circle. Any players hit will take moderate magical damage and will be knocked back. The Gravelight Sentry's version of Shockwave is much larger than usual and will throw players away much further, usually into the toxic water. Roll dodge or sprint to quickly escape the water.
- Summon Venomous Skeleton: The Xivkyn Necromancers will channel a spell that will summon a Venomous Skeleton to attack the party if completed. This can be interrupted. Killing the necromancer will also cause all the skeletons it summoned to immediately die. When three Xivkyn Necromancers are killed, the Gravelight Sentry will glow red and enrage, causing the special version of Corrupt Water to activate as described above.
Flesh AbominationEdit

The boss summons Necrotic Hoarvors to attack the party throughout the battle. They should be killed quickly to simplify the fight.
- Monstrous Cleave: A basic melee attack that deals high physical damage and knocks down all targets within range. Do not stand in front of the boss unless you are the tank. Getting hit by Monstrous Cleave will deal moderate physical damage over time.
- Poison Well: After some time, the boss places poison AOEs under each player that will follow them, dealing moderate poison damage and knocking them back. Block to prevent this. Following that, the boss places a ring around a random player. This ring deals very high poison damage over time and must be avoided, if you are within the ring simply wait for it to dissipate.
- Bursting Slam and Exploading [sic] Hoarvor: After Poison Well, the boss runs to the middle of the arena and summons 4 Necrotic Hoarvors. The boss them slams the ground stunning all players while the hoarvors explode dealing high poison damage as indicated by large red circles. Players should hug the walls of the arena to avoid the AOEs
Lord-Warden's CouncilEdit
The Lord-Warden's Council is a group of four Xivkyn whom you'll encounter right before facing the Lord Warden himself. They don't have many unique abilities, though there are a few things you'll need to watch out for. Namely, when one Xivkyn falls in battle, their shadow rises from their corpse. These shadows cannot be attacked, and serve as a nuisance while your group tries to take down the rest of the council.
- Lord-Warden's Templar: The Lord-Warden's Templar is a Cauterizer. One of its class abilities is Rite of Passage: the enemy channels a spell healing itself and nearby allies for 4 seconds, usually done when the enemy is on low health. This spell can be interrupted to set the enemy off balance.
- Lord-Warden's Necromancer: The Lord-Warden's Necromancer can summon Bone Surge Totems. All four council members become immune to attacks when a Bone Surge Totem spawns.
- Lord-Warden's Knight: The Lord-Warden's Knight is a Dragonknight, and can summon a Dragonknight Standard.
Lord Warden DuskEdit

The boss summons floating Shadow Orbs that tether to nearby players, dealing moderate magical damage over time and snaring them. The tether can be broken by keeping your distance from the orbs.
The boss summons portals that move on the ground. Entering one will cause you to fall through and drop down from the ceiling. You can survive the damage by using the synergy to Brace for Impact. Do not enter the portals until Darklight Burst is cast, as using the portal early will waste a slot, causing a death later during Darklight Burst. Falling into a portal after falling from another portal will deal lethal damage in the form of Portal Feedback. Do not enter the portals until Darklight Burst is cast.
He will drop a head piece from the Lord Warden set when he is defeated on Veteran difficulty. Loot from the fight spawns in a chest that appears at the western end of the arena.
- Summon Shades: At 66 and 33% health, the boss disappears and summons 4 Shades to attack the party. Once all shades are defeated, the boss reappears. On Veteran difficulty, only two of the Shades can be damaged at a time: two of them are translucent, blue and invulnerable at all times. Stick with the group and aim for a Shade that has a physical form.
- Coldharbour Meteor: Lord Warden casts a meteor on one player during Shade phase stunning them and dealing moderate magical damage. This attack must be blocked to negate the incoming damage.
- Darklight Burst: The Lord Warden flies up and channels a magical ball in his hands, shooting it down at everyone below. The only way to avoid it is to jump into the portals before he casts it, and brace for impact when dropping down from the ceiling. Only two people are allowed per portal. This attack is lethal on veteran if not avoided.
- Shadow Bolt: A basic ranged attack that deals minor magical damage.
- Shadow Strike: The boss teleports onto whoever has aggro, stunning them and dealing moderate physical damage.
SublocationsEdit
Prison DistrictEdit
The Prison District is the exterior of the prison itself, and where you find yourself when you first enter the dungeon. A note can be found next to a charred corpse at the top of the stairs leading towards the Bastion. The Daedric Shackle Trophy Vault is found here.
BastionEdit
The Bastion is the primary above-ground section of the prison. The Imperial Prison Discipline Records can be found on a table to the left of Lyranth in the first chamber. Captain Ululmalit is located in the second cell on the right in the first cell block. A suicide note can be found in the last cell on the left. A heavy sack can spawn in the corner just left of the door in the last cell on the right.
A chest can spawn on the east side of the Overfiend's chamber, amid a bench and two tables (one overturned with a corpse hanging over the side, the other's contents scattered across its surface) by a pile of rubble encircling a steaming portal to Oblivion.
Imperial PrisonEdit
A Necromancer's Journal can be found in the first cell in the back of the hallway beyond the Overfiend's room. Libertas Axilla can be found in the second cell block. The Overfiend is located here. Before you engage him in combat, you'll find him feasting on a dead prisoner.
Imperial SubterraneEdit
The Flesh Sculptor resides within the meat covered walls. Several pamphlets can be found within these caverns. Pitro Fidenas can be found in the third cell block, within a cell beyond the Flesh Sculptor's domain. The Flesh Abomination can be found at the end of these tunnels.
Unnatural CavernsEdit
A Frayed Note can be found in a cell on the right-hand side. A Battered Note can be found on a table upstairs from the Gravelight Sentry's arena.
Lost SanctumEdit
The Lord-Warden's Council can be found here. Beldorr and his last words are in front of the Lord Warden's dwelling.
BooksEdit
These books are sorted by when you encounter them in the dungeon.
- Tattered Note — A note detailing Molag Bal's plans in the Imperial Prison
- Imperial Prison Discipline Records Sanctioned by Warden Arius — The increasingly harsh punishments handed out for infractions at the Imperial Prison
- Frayed Note — A frayed Note
- This is the End — A Gray Viper laments the destruction of the Imperial City and his plan to "escape"
- Necromancer's Journal — A necromancer's thoughts on surviving the Daedric invasion of Tamriel
- A Way Out — A prison escape plan
- Battered Note
- Beldorr's Note by Beldorr
SetsEdit
| Set Name | Bonuses | Location(s) | Set Type |
|---|---|---|---|
| Scathing Mage |
2 items: Adds 25-1096 Maximum Magicka |
Imperial City Prison |
Light Armor |
| Sheer Venom |
2 items: Adds 25-1096 Maximum Stamina |
Imperial City Prison |
Medium Armor |
| Leeching Plate |
2 items: Adds 28-1206 Maximum Health |
Imperial City Prison |
Heavy Armor |
| Lord Warden |
1 item: Adds 34-1487 Armor |
Imperial City Prison |
Monster Helm Sets |
AchievementsEdit
There are nine Achievements associated with this dungeon:
NotesEdit
- Exiting the Imperial City Prison will return you to your last non-dungeon location.
- The Imperial City Prison also appeared in Arena, Oblivion and Oblivion Mobile.
- The dungeon originally had a minimum enemy level of 35. This was reduced to 10 in one of the updates.
GalleryEdit
-
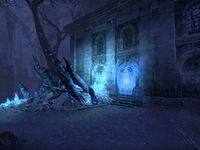
Daedric Shackle Trophy Vault
-
The first cell block
-
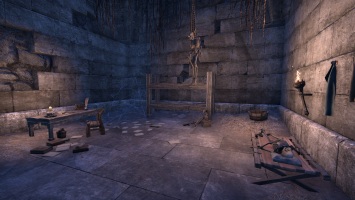
A cell in the first cell block
-
A corner of a corridor with a portal, near the Overfiend's chamber
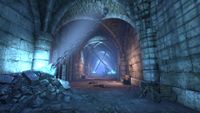
-
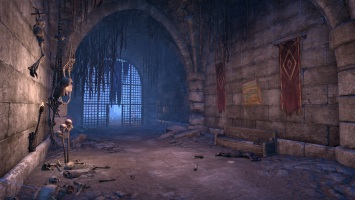
The Corridor leading to the Overfiend's chamber. Remnants of mortal activity remain.
-
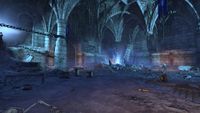
Imperial Prison, The Overfiend's chamber
-
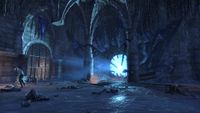
The Overfiend's chamber
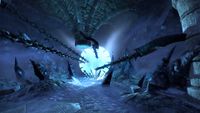
-
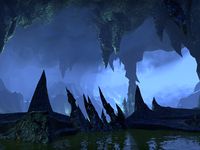
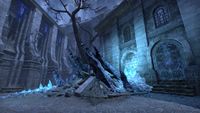
The caverns beneath the prison
-
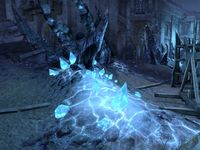
Some effects of the Planemeld
-
Some effects of the Planemeld
-
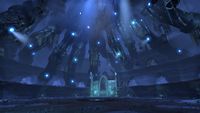
Lost Sanctum


.jpg)
MapsEdit

Door 1
Door 2
Ladder
Daedric Shackle Trophy Vault
A map of the entrance of Imperial City Prison
|
|
A map of the first area of Imperial City Prison
|

|
A map of the second area of Imperial City Prison
|

|
A map of the third area of Imperial City Prison
|

|
A map of the fourth area of Imperial City Prison
|
