|
|||
|---|---|---|---|
| # of Zones | 1 | ||
| Clearable | Yes | ||
| Dungeon | Yes | ||
| Respawn Time | 10 days or 30 days | ||
| Level | Min: 18 | ||
| Occupants | |||
| Falmer, Chaurus, Bandits, Skeevers | |||
| Important Treasure | |||
| Moth in a Jar Purloined Shadows The Wolf Queen, v1 |
|||
| Console Location Code(s) | |||
| DuskglowCreviceExterior, DuskglowCrevice01 | |||
| Region | |||
| The Pale | |||
| Location | |||
| South of Dawnstar East of Fort Dunstad |
|||
| Special Features | |||
| # of Cooking Pots/Spits | 1 | ||

Duskglow Crevice is a small cave south of Dawnstar containing Falmer, chaurus, bandits, and skeevers. It contains only one zone, Duskglow Crevice.
The Falmer and chaurus are battling a few remaining bandits; you will encounter several bandit corpses as you explore.
Related QuestsEdit
- This location is one of many potential targets for one or more of the Radiant quests.
WalkthroughEdit
ExteriorEdit
The main path leading to this cave is off of the road between Dawnstar and Windhelm, not far north-northeast of the Weynon Stones. It is also possible to approach from Fort Fellhammer. In front of the entrance is an extinguished campfire, several Falmer totems, and, immediately to the left, a patch of bleeding crown fungus.
Duskglow CreviceEdit
The entrance leads directly into a natural tunnel that descends to the north. As you follow the tunnel as it twists and turns, you may overhear and then encounter two bandits as they wander along the passage discussing the "cave people" who have been harassing and stealing from them. As you may have noticed from the chitinous decor, they are of course referring to the Falmer. There are several patches of both bleeding crown and fly amanita fungi throughout the cave system. Just before you emerge onto a ravine ledge, there is also a patch of white cap fungus. Opposite is another ledge where two Falmer are battling a lone bandit. Once they have dealt with the bandit, if they have been alerted to your presence, they will immediately converge on you via a ledge they can drop down from the far side (see notes). There is a gated passage at the back of the opposite ledge, while the one-way ledge is your shortcut back out later. It is possible using the Whirlwind Sprint dragon shout or careful jumping to reach the far ledge; however, this is of little use, as there is no way of raising the gate blocking access to the remainder of the cave system from this side.
A path descends on your left, with several switchbacks before leading to a lower level that exits the ravine to the north. The passage is linear, and after a short distance it turns to the east and reaches a Falmer gate. Past the gate, the passage is filled with cobwebs, and you will encounter a couple skeevers. The passage continues to twist and turn, until you reach a point where the architecture changes to that typically found in Nord barrows. To your right is a throne, with a large urn farther along to the right of a gap between two sections of Falmer fencing. Beyond this is a small Falmer encampment, with the path skirting around a small pool. Two Falmer inhabit the camp, one of which is leveled. There is nothing of interest in the water. The encampment consists of two Falmer tents. The tent to the north contains a small fire and has a loose chaurus egg in a wooden bowl and a charred skeever hide on a flat rock in front. The tent to the southwest contains an unlocked Falmer chest. There are two exits from this cave. The one to the northwest leads to a small cave containing a leveled chaurus, many chaurus egg sacs, a dead bandit, and a skeever tail in a stone bowl under a decapitated skeever. The second exit is just to the right of the second tent.
The passage heads west then south, and opens into a cave with a leveled Falmer magic-user standing behind a flat-topped rock that's being used as an altar of sorts, with the body of a dead bandit in front beside a lit brazier and three loose chaurus eggs. On top of the rock is a Falmer sword, a random poison, and a filled random soul gem. Behind the rock at the back of the cave is an unlocked Falmer chest, while the exit passage is found to the west. At the top, it turns south and enters a cave containing a leveled chaurus, with many more egg sacs around the cave and the body of yet another dead bandit. The exit is to the east and continues to climb. After a couple turns and just before it enters a room with more Nord barrow-style architecture, there is a tripwire that triggers a claw trap from above in front. On the right is a burial urn, while in front are wooden stairs leading up to a balcony with another burial urn at the far end and a doorway into a larger room where a leveled Falmer and leveled chaurus or chaurus hunterDB battle a bandit. This larger room is split into two levels. The lower level has more egg sacs, a broken cart with tomatoes scattered across the floor, and opposite where you enter is the gated doorway seen near the beginning of the cave system. To the southwest is a sarcophagus with two burial urns beside it.
On the right, stone stairs rise to the upper level, where the fight took place. On the front edge, to the left, is a burning brazier with a chain beside it that opens the gate below. There are three sets of shelves against the south wall. The first holds a filled random soul gem, a random potion, a random poison, and many ruined books. There is a food barrel to the right before the next shelves, which hold two rock warbler eggs. The last set of shelves has a copy of Mixed Unit Tactics, a pair of random boots, two pieces of firewood, and various cheap crockery and clutter. On top are a further four common books. There is a stone table beside a partition near the stairs, with a woodcutter's axe, a copy of the Pickpocket skill book Purloined Shadows, a random greatsword and helmet, a chaurus egg, two bottles of wine, a bottle of Black-Briar Mead, and a bowl of ectoplasm on top. Some of the items may have been knocked off the table during the fight. Beside the table is a stone bowl on the ground containing four leeks, and beside this is a basket containing two bunches of lavender.

Against the north wall are two sets of shelves. The first holds a piece of firewood, a cow hide, and a corundum ingot, with a horse hide on the floor in front (see bugs) and a lute leaning against the side. The second holds a random helmet and another lute. In the middle of the room is a campfire with a cooking pot on a stand beside it, and by a stone pillar is a rack hanging from the ceiling holding a garlic braid and pheasant. Beside another pillar is an end table with a moth in a jar on top. Toward the rear of the room are several strings of bone chimes hanging from the ceiling. Against the west wall is an upright sarcophagus with a small, medium, and large coin purse to the right, and farther to the right, on the ground is a bottle of Black-Briar Mead. To the left is a stone table with an unlocked Falmer chest, a copy of the Lockpicking skill book The Wolf Queen, v1, a common book, a ruby, and a flute on top.
Passing through the gate will bring you back to the ledge near the entrance upon which you saw the battle between two Falmer and a bandit, overlooking the ravine. Follow the ledge on the left to drop down and retrace your steps for a quick exit.
NotesEdit
- It is entirely possible for the two Falmer to cross the ravine before you enter and attack the two bandits waiting in the entrance passage. If this has happened, and they have killed the two bandits before you arrive, they may be lying in wait anywhere, and may even have gone down into the bottom of the ravine. Also, if they have crossed the ravine, the chaurus hunter in the final cave (across the ravine behind the barred gate) may show on your compass bar as a hostile, even though it is behind the gate.
BugsEdit
- You may not be able to interact with the horse hide and with one of the rock warbler eggs.
MapsEdit
-
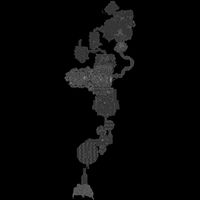
Duskglow Crevice
