|
|||
|---|---|---|---|
| # of Zones | 1 | ||
| Clearable | Yes | ||
| Dungeon | Yes | ||
| Respawn Time | 10 days or 30 days | ||
| Level | Min: 18 | ||
| Occupants | |||
| Falmer | |||
| Console Location Code(s) | |||
| Kagrenzel01 | |||
| Region | |||
| Eastmarch | |||
| Location | |||
| Southeast of Windhelm East-northeast of Ansilvund |
|||
| Ore Veins | |||
| # of Moonstone | 1 | ||

Kagrenzel is a small Dwarven ruin southeast of Windhelm containing Falmer. It contains only one zone, Kagrenzel.

WalkthroughEdit
ExteriorEdit
You can reach the ruin by following an unmarked path into the Velothi Mountains east of the tower of Ansilvund. Be careful as you progress, as you may encounter a leveled conjurer at the tower and some frost trolls along the path.
There is an unmarked hunter's camp a short distance south of the path on a ridge, where the path turns to the northeast and just before the start of several flights of stairs leading up to the ruin. It is inhabited by two hunters, and contains a campfire with a wooden bench beside it. There are two small tents containing unowned bedrolls, with a snowberry bush between the tents and a few barrels of food around the fire, one of which has a copy of the Archery skill book Father Of The Niben on top. The skill book is marked as unowned, and is free to take.
There is an iron ore vein by the top of the first flight of stairs. There are three more flights to climb and two square arches to pass under. At the top, you can see a large Dwemer building. The entrance is on the east side of the building, with three damaged square arches in front. A short distance east is a moonstone ore vein, and a short distance northwest is a gold ore vein.
KagrenzelEdit

Through typical large metal doors found in Dwemer ruins, the entrance opens into an empty room with stairs opposite leading to another pair of metal doors. These open into a cavernous room with three pillars in a row opposite. The room is fairly dark, with rubble all around. In the center of the room is a stone pedestal with the bodies of two dead bandits lying on the ground beside it. A bright orb appears above the pedestal accompanied by musical chimes when you get close enough, as defined by a large invisible rectangular area. Moving around the edges of the room will result in you leaving this unmarked rectangle and will turn off the orb. There is a metal circle on the floor surrounding the orb and bodies. It is best to save at this point. Touching the strange orb causes a Dwemer cage to ensnare you as the orb rotates around the outside several times, then falls into the pedestal it was above originally. The floor gives way shortly afterward. As you plummet hundreds of feet below the surface of Skyrim, you can guide your fall. If done properly, you will survive by landing in a deep pool of water littered with the bones of a mammoth. One way to minimize the chance of hitting anything on the way down (and dying) is to clear the platform of all bodies and pots before you touch the orb. Then, stand in the exact center of the platform and wait for the floor to open.

Swimming down from where you landed in the pool, you will discover an expert-locked Dwemer chest. There is a tunnel near the edge of the pool to the south with unoccupied Falmer hives on either side and an unlocked Falmer chest sitting just to the right on a large rock. As you head up the tunnel, it turns east after a few paces and starts to climb very steeply. There are Falmer hives on the walls; however, most of these are empty. The use of Detect Life or the Aura Whisper shout is recommended. The ground may shake and the occasional rock may roll down, causing minor injuries if it strikes you. At the top, a moonstone ore vein is found where the passage turns north. You will eventually reenter the main chamber on an L-shaped stone bridge with a large fire pot burning in the corner. On the left-hand side of the fire pot is a small adept-locked Dwemer chest, with a random potion of invisibility beside it. A patrol of three Falmer will enter onto the bridge from the opposite end, then cross to the side you entered through before returning the way they came. There is also a fourth Falmer hidden in a hive on the wall at the far side.

Crossing the bridge and continuing to follow the passage, you will pass several more Falmer hives until you reach a section with two waterfalls, one in front and one on the left, an archway, and another Falmer chest. Climbing up to the waterfall on the left will reveal a centurion dynamo core within the stream. A flawless diamond will be visible from this position atop the archway; it can be obtained using several methods, including Telekinesis, the Unrelenting Force shout, or an arrow. Following the stream under the arch leads to Stony Creek Cave.
NotesEdit
- Facing the entrance from outside, you are facing west; however, as soon as you enter, with your back against the door, you are now facing south.
- If you view the large pool room on your map, you will see several massive rib cages, which are possibly mammoth remains.
- The large cavern beneath the ruin may be accessed via Stony Creek Cave. However, the room with the glowing orb is not normally accessible if you enter from this direction (see bugs).
- You can enter Kagrenzel from Stony Creek Cave by carefully jumping up the small rock face beneath the waterfall at the end of the cave or by using the Whirlwind Sprint shout when standing on a small hill to the right of the waterfall.
BugsEdit
- For quests related to Kagrenzel, your map marker may point you to Stony Creek Cave. This also applies to the Clairvoyance spell.
- You can reach the glowing orb's room from the pool room by swimming through a gap in the eastern wall north of the rocks that jut into the pool.
- If you have a follower, they may enter Kagrenzel with you from the trapdoor direction, then disappear and not return. This often occurs because the game placed the follower at the top of the main chamber instead of beside you, and they fell and died outside your view. ?
GalleryEdit
-
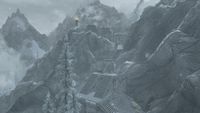
Path to Kagrenzel
