|
|||
|---|---|---|---|
| # of Zones | 1 | ||
| # of Welkynd Stones | 12 | ||
| # of Varla Stones | 0 | ||
| Occupants | |||
| Monsters (1 boss-level Monster) |
|||
| Important Treasure | |||
| 1 boss-level Ayleid Coffer | |||
| Console Location Code(s) | |||
| NarfinselExterior, Narfinsel | |||
| Region | |||
| Great Forest | |||
| Location | |||
| Just north of Molag Bal's shrine, which is due east of Weatherleah | |||
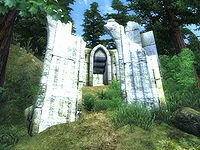
Narfinsel is a small Ayleid ruin between Chorrol and Skingrad containing monsters. It contains only one zone, Narfinsel.
NotesEdit
ExteriorEdit
- The exterior is located at coordinates: Tamriel -12, 15
- This location's map marker (M on map) is named Narfinsel (editor name NarfinselMapMarker). The entrance door is NW of the marker, 80 feet away.
- The following plants can be found near the entrance: 3 Fly Amanita plants, 13 Green Stain Cup plants, 29 Monkshood plants, 12 Motherwort plants, 10 Somnalius plants, 28 Steel-Blue Entoloma plants, 10 Summer Bolete plants, 6 Tiger Lily plants, and 33 Viper's Bugloss plants
Zone 1: NarfinselEdit
After descending the two sets of stairs at the entrance, you will arrive in a small chamber with alcoves built into the walls and two exits out. In one of the alcoves is an Ayleid cask, and the chamber is patrolled by one monster enemy guarding the loot. The southeast exit in this chamber accesses the boss area, but is initially obstructed by the gate at E, which is opened by a pressure pad on the opposite side of the gate. Thus, your only option currently for further exploration is the southeast exit.
The southwest exit leads to a three-way intersecting hall, with an Ayleid cask in its center. At this intersection, you can access the remainder of the ruin, separated into three distinct sections.
- The gate immediately facing you upon entering the intersection leads only into a small room with one Ayleid cask and a monster enemy.
- The gate at your left accesses a northeast section of the dungeon with two chambers. The closer chamber features a malfunctioning Gas Room trap, D (see Notes for information regarding its behavior), and four Welkynd stones perched high up on pedestals. Use arrows or target spells to knock them off. The farther chamber contains another Ayleid cask and a trio of monster enemies.
- The gate to your right leads to the majority of this dungeon's treasures, including the Ayleid Coffer (B), as well as the remainder of the creatures that haunt its halls. The initial hall you enter in this section contains three monsters, two Ayleid casks, and eight Welkynd stones. A hallway at the end of this chamber contains two more casks and accesses this ruin's boss area. This chamber contains numerous gas traps (C) in addition to the boss enemy and Ayleid coffer. Once you have slain the boss and gathered the treasure, you can activate the pressure pad to open the gate at E and easily return to the ruin's exit.
Occupants:
- 1 boss-level Monster in the gas trap room at location A on map
- 8 Monsters
Treasure:
- 1 boss-level Ayleid Coffer (Monster variety; locked) at location B on map
- 3 Ayleid Casks 01 (1 locked)
- 3 Ayleid Casks 02 (2 locked)
- 2 Restoration Ayleid Chests
- 12 Welkynd Stones
Traps:
Doors and Gates:
- There is one door (at Out) in/out of this zone, leading outside
- 1 Iron Gate at E (opened by activating the pressure pad marked on the map as a cyan dot)
