|
||||
|---|---|---|---|---|
| Worldspace | ||||
| Discoverable | No | |||
| Dungeon | (?) | |||
| # of Zones | 1 | |||
| Occupants | ||||
| Shyazzel the Traveler Animated Armor, Gargoyle, Golem Invoker, Golem Champion, Sabre Cat |
||||
| Location | ||||
| Center of Iliac Bay, between Glenumbra, Stormhaven, and the Alik'r Desert | ||||
| Loading Screen | ||||
 "No one can say precisely how old the Adamantine Tower is. Or how deep it goes. But those who sought to plumb its secrets often left mysteries of their own."—Tessurian Direnni
|
||||

The Isle of Balfiera (also called Balfiera Island) is an island found off the coast of the Iliac Bay. All characters created after the release of Blackwood will be placed in this zone to go through a quest that serves as a tutorial over the game's systems.
Reaching the Keywright's Gallery will give the player access to one of the portals that will transport the player to a zone of their choice to begin the rest of the game. There are currently placeholders for 16 total portals, with the release of Gold Road opening the 11th portal. The remaining portals are currently inactive, to be opened with further expansions.
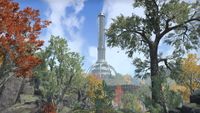
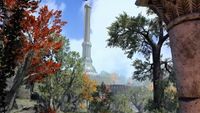
It is the home of the Adamantine Tower, the oldest structure in Tamrielic history, as well as the Direnni Clan.
For more information, see the main lore article.
Related QuestsEdit
The Gates of Adamant: Defeat a Daedric terror and depart from Balfiera.(disabled since Update 44)
PeopleEdit
LayoutEdit

Balfiera RuinsEdit
This is a large building containing the prison, training room, and armory as well as various hallways. It is where players enter the game. This ruin as well as the others are in disrepair with chipped masonry and overgrown vines. Lootable urns are scattered throughout.

Player CellEdit
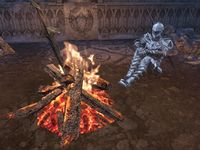
Upon beginning the tutorial, players will wake up in a locked cell. The cell has barred windows on one wall, a campfire in the middle of the floor, and a locked gate on the opposite wall.

Forgotten CellsEdit
There are four barred cells surrounding a large open central courtyard. The player emerges from the one in the southwest corner. The northeast cell contains an easter egg. The northwest and southeast cells hold only rubble. In the center of the room is a green space with several trees and a ring of ruined pillars with a shallow pool in the middle. On the north side of the courtyard, several weapons are laid out near the hallway to the door of the training room.

Training RoomEdit
A short hallway leads to a large open space with a central dais for practicing combat and a raised walkway above, which is not accessible from this room. There is a strange suit of armor on the dais. Leaving the training room and heading up the curved stairs, there will be a golem banging on a closed door straight ahead, but the hallway forks here.

Balfiera ArmoryEdit
Players can sneak left by the golem at the armory's entrance or take it down and pick the trivial-level lock to gain entry. The room is large and open with armor and weapons arrayed in a ring in the center. At the far end of the room is a forge on a raised platform.

Long HallwayEdit
After going past the armory to the left, you will cross a raised walkway and enter through a door into a long hallway. This is where players can practice sprinting. There are barred windows looking out over the isle at a ruin made of a ring of arches around a statue guarded by a gargoyle. Flowing water can be heard but not seen. This is the last room players pass through before exiting the initial building.

Balfiera IslandEdit
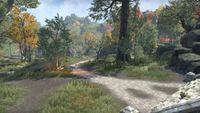
Upon exiting the ruins, players will be on a large, covered, curved patio with stairs on either end leading down to the ground. From here, players have a good view of the Adamantine Tower across the way. The portion of the island players traverse is wooded with many possible paths, some paved and some dirt. Boulders dot the landscape. There is a waterfall at the east end of the trail. The entrances to several ruins surround the area, including two unknown ruins as well as three which players visit. The ruins are set into high, unpassable rock cliffs. Hostile golems patrol the area.
Squirrels and butterflies dwell in the verdant gardens of Balfiera. Meanwhile, frogs, dragonflies, and mudcrabs make their home at a pond next to the Skyshard Vault.

Skyshard VaultEdit
After visiting the foyer initially, players will travel south to another smaller ruin just past the waterfall. Entering the building reveals a short hallway leading to a large, open, circular room with an opening in the roof and pillars and statues ringing the walls. Across the room is a raised area with an altar holding a skyshard. A gargoyle guards it.

Gallery FoyerEdit
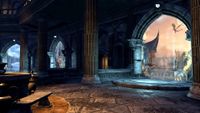
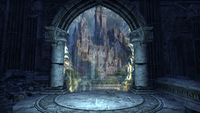
The foyer is the first room in gallery building, which is a large complex on the east side of the woods. Players visit it twice as they initially realize the gate to the next room is not working and they will need to get a skyshard from the vault to repair it in order to continue. The foyer itself can be reached by traversing either the north or south stairs up to a large covered patio with an Elven statue across from the door. Inside are two similar statues surrounded by four pillars. Ahead is a blue flame brazier on a dais with a curving staircase on either side. Upstairs is a small chamber with a pedestal holding the skyshard that is meant to open the way to the antechamber.

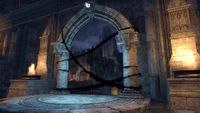
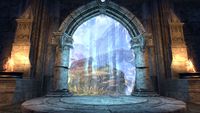
Gallery AntechamberEdit
The antechamber is a large, dark room with a partially collapsed ceiling. There is another door directly across the room, but it is guarded by a Harvester .
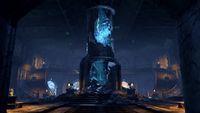
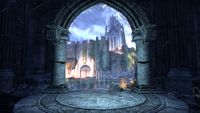
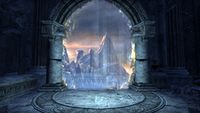
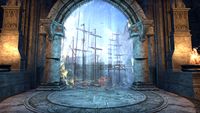
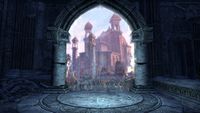
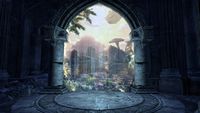
Keywright's GalleryEdit

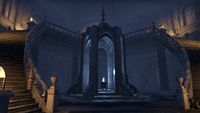
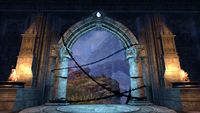
After passing through the antechamber and heading down a flight of steps, players will be on an upstairs landing surrounded by bookshelves. Ahead is a barred wall overlooking the central area below. On either side is a curved staircase down to a small side room that then passes under a balcony into the large central chamber. In the middle of the room is the arcane helix, reaching up through the ceiling, slowly rotating, and surrounded by floating debris and electricity. There are two balconies on the northwest and southeast sides of the room that can each be accessed by a pair of curving staircases.
The room contains arched gateways to many locations across Tamriel and beyond that players can use to jump into the main questlines of the game after creating a new character. In the center of the room is a revolving helix-shaped structure that appears to be powering the portals. Once the tutorial quest is complete, the Direnni elf Norianwe will provide information on each possible travel location. After exiting through a doorway, players cannot return to this room unless they create a new character.
NotesEdit
- The island is not intended to be reached as it is surrounded by slaughterfish-infested waters, although it exists in the worldspaces of both Glenumbra and Stormhaven (but not in the Alik'r Desert, despite the map of the region extending to its waters).
- At the end of The Gates of Adamant quest, you must leave Balferia and choose your own starter zone to begin your adventure in, though you will not be able to do their respective tutorials. This effectively renders the following content deprecated:
- Skipping the tutorial will just drop you off in the zone from the most recent Chapter release you own.
- There were originally unimplemented plans for Balfiera to be an instanced location in the initial Main Quest storyline, and later as a Battleground.
- The tutorial was first announced in ESO 2021 Global Reveal Event - Gates of Oblivion by Pete Hines and Rich Lambert. The placeholder model originally had White-Gold Tower.
- Balfiera Herbal Tonic is named after the island.
- In the room where you choose your weapon, you can look to your right into a cell to find a reference to the game Dark Souls. For more information, see the Easter Eggs page.
MapsEdit


GalleryEdit
Post-BlackwoodEdit
- Balfiera
-
As seen from Stormhaven
-
Isle of Balfiera
-
Isle of Balfiera
-

Isle of Balfiera
-
Balfiera Ruins
-
The helix within the tutorial
-
Portals
-
Locked Portal
-
Early version of the Direnni Tower
-
Dark Souls Easter Egg
-

Skyshard Vault, exterior


- Keywright's Gallery
-
The arcane helix
-
Portal to Blackwood
-
Portal to Bleakrock Isle
-
Portal to High Isle
-
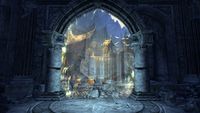
Portal to Khenarthi's Roost
-

Portal to (Northern) Elsweyr
-
Portal to Stros M'kai
-
Portal to Summerset Isle
-
Portal to the Telvanni Peninsula
-
Portal to Vvardenfell
-

Portal to Western Skyrim
-

Portal to West Weald
-
Example of portal showing locked content (must purchase)


.jpg)
Pre-BlackwoodEdit
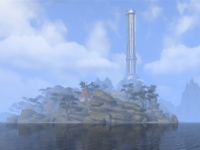
The Stormhaven version is usually more visible due to its tropical weather and standard lighting. It features sandy/grassy terrain and desert rocks on its landscape, coupled with a few tropical trees on the north side. This version of the island extends farther east, having some untextured land that stretches towards Glenumbra. The tower is surrounded by hills, and there is a small body of water (also filled with slaughterfish) at the base of the tower. The following are pictures of the Stormhaven instance of Balfiera:


The Glenumbra version is often shrouded by rainy weather and dim lighting. It has a very rocky terrain, making it very hard to traverse, but there's cove on the north side and some beaches. The island is also seen on the map of Glenumbra, where it is rather circular. The following gallery contains screenshots of the Glenumbra instance of Balfiera:


