|
||||
|---|---|---|---|---|
| Trial | ||||
| Discoverable | Yes | |||
| Completion | Objective | |||
| Dungeon | Yes | |||
| # of Zones | 1 | |||
| Zone | ||||
| Haafingar, Western Skyrim | ||||
| Location | ||||
| North of Kilkreath Temple Wayshrine | ||||
| Instanced Dungeon | ||||
| Group Size | 12 | |||
| Bosses | 3 | |||
| Mini-Bosses | 0 | |||
| Veteran Speed Run Target | 35 mins | |||
| Crafting Stations | ||||
|
||||
| Loading Screen | ||||
 While many Nords attribute the founding of Kyne's Aegis to Fuldimar Hookhand in 1E 244, Dragon Cult ruins tell a far older—and darker—story.
|
||||

Kyne's Aegis is an island bastion in the Sea of Ghosts. It is located on an island north of Solitude.
Its original purpose was to be a bulwark against northern invasions which approached the coast via the easiest channel. Thane Ogvar was given ownership over the fort and over time, it morphed into a northern fishing village in addition to a fort. The island's gold veins have led to the Thane establishing a mining operation. Until recently, the fort has remained peaceful with only the occasional northern squall cropping up to cause concern. The transformation of the island to a fishing and mining spot has led to the slow decline of the fort.
A short time ago, tremendously large longships appeared to the north. Before a proper defense could be mustered, these ships crashed into the island, disgorging Sea Giants and Half-Giants onto the island, led by a powerful Vampire lord. These creatures of myth quickly overwhelmed the northern island and have begun the assault of the fort proper. With the island threatened, the Thane has sent for assistance from anyone that can reach the island.
A copy of Convergence of Maestros, Volume 2 can be found near the boat that takes you to the trial.
You will receive a Defiled Oathstone with your other rewards after defeating Falgravn with hard mode engaged.
Related QuestsEdit
- Kyne's Aegis Objective: Join Thane Ogvar in Kyne's Aegis. / You helped Thane Ogvar defend Kyne's Aegis.

 The Fight for Kyne's Aegis: Retake Kyne's Aegis from a Vampire Lord's army.
 Reinforcement for Kyne's Aegis: An island bastion calls for aid!
CharactersEdit
EnemiesEdit
Normal EnemiesEdit
- Bitter Knight
- Coagulant
- Crimson Knight
- Gryphon
- Harrowfiend
- Vampire Assassin
- Vampire Foot Soldier
- Vampire Frost Mage
- Vrolsworn Conjurer
Elite EnemiesEdit
- Bitter Knight
- Blood Knight
- Butcher's Fire Shaman
- Chaurus Totem
- Crimson Knight
- Dragon Totem
- Half-Giant Apothecary
- Half-Giant Bulwark
- Half-Giant Butcher
- Half-Giant Harpooner
- Half-Giant Marauder
- Half-Giant Raider
- Half-Giant Savage
- Half-Giant Sea Shaman
- Half-Giant Storm Caller
- Half-Giant Tidebreaker
- Harpy Totem
- Gargoyle Totem
- Sanguine Prison
- Storm Twin
- Vampire Infuser
BossesEdit
Trial MechanicsEdit
AddsEdit
In this trial, you will encounter various Sea Giant and Vampire adds around the island, as well as during boss fights. The following list shows adds and their abilities to look out for.†
- Types of Adds

-
- Half-Giant Bulwark: Uses Sword and Shield and as soon as they are taunted they cleanse all debuffs. Make sure the Tank taunts, waits a second for them to cleanse and then have the damage dealers drop ultimates on the stack. Low Priority.±
- Half-Giant Raider: Ranged Holding Harpoon, they can kill you. Low Priority.
- Half-Giant Tidebreaker: Fights with a combination of water magic and a 2H Sword. Has a cleave attack, so tanks should make sure they are not facing towards the group. When they use their major attack, Crashing Wave, the Tidebreaker will stab their sword into the ground and let loose a wave. This can easily one-shot you, so it must be avoided by dodging or otherwise. High Priority for new groups, Low Priority for those experienced.
- Half-Giant Storm Caller: Uses storm magic and will drop lightning AOEs onto the ground. Medium Priority.
- Vampire Infuser: A vampire mage that can empower their allies. Their ability is channeled and if it is allowed to go off, it will enrage the other adds and easily cause a wipe. High Priority target, have group members focusing on interrupting their channeled ability.
- Butcher's Fire Shaman: A mage. Will summon totems that must be destroyed immediately if they spawn. High Priority.
- Crimson Knight: Will enrage itself, when it heavy attacks it will one shot the tank. Make sure the heavy is dodge rolled. If the tank range taunts and then immediately blocks they should be safe. The major mistake that happens is tanks will think they have more GCDs than actually available to block.
- Bitter Knight: Will cast sanguine prison on a player, the player will be kneeling with a red bubble around them. You must destroy this bubble before it kills the player. It lasts 8 seconds.
- Blood Knight: Will wave his arms up in the air for 3 seconds, after which lines will come out in a cross from him. DPS should be standing in one of his corners to protect themselves from this. Each quarter second you stand in his line you take increased damage, you most likely won't notice the stacking debuff so make sure you are positioned away from the lines coming out of him.
Pre Yandir Trash PullsEdit
1. Stack Bulwark on top of Raider. Focus: Raider -> Bulwark.
2. Stack Bulwark and Tidebreaker on top of Raider. Focus: Tidebreaker -> Raider -> Bulwark.
3. Stack Tidebreaker on top of Raiders and burn. Focus: Tidebreaker -> Raiders.
4. Taunt one of the raiders on top of the other one and burn.
5. Stack Bulwarks and Tidebreaker on top of the Storm Caller. There is a Tidebreaker far to the left overlooking the cliff. Focus: Tidebreaker -> Storm Caller -> Bulwarks.
Yandir the ButcherEdit
Pre Vrol Trash PullsEdit
The add phases after Yandir can be a bit more challenging but should be doable for all vet ready groups.
1. Stack both Tidebreakers on top of the Raider. Focus: Tidebreaker -> Raider.
2. Stack Bulwarks on the Shaman or to be safe, separate the Bulwarks. Focus: Shaman -> Bulwarks. This is your first experience with the Shaman, make sure he does not spawn a totem, he must die incredibly fast.
3. Stack Bulwark and Tidebreaker on top of the Shaman. Focus: Shaman -> Tidebreaker -> Bulwark -> Storm Caller. If you have trouble you can instead focus the Storm Caller before the Bulwark.
4. Stack Shaman on Raiders. Focus: Shaman -> Raiders.
Captain VrolEdit
Pre Falgravn Trash PullsEdit
These are some of the hardest add pulls in the game. Specifically the last one, some consider that add pull harder than some boss fights on Veteran. To do this pull effectively you will need to have the Healers run Inner Fire to taunt certain adds.
1. There will be 3 Infusers around a tent and a bunch of trash that explodes upon dying leaving a AOE on the ground. Taunt all 3 and then go into the tent on the left side. This will line of sight them into a neat stack. DPS then kills them. Make sure you are paying attention to interrupts when necessary on the Infusers. At this point I suggest DPS start saving ultimate for pull 4, you will need as much burst as possible.
2. There are 3 Infusers and a Crimson Knight. Have the main tank immediately taunt the Crimson Knight and an Infuser, while the off tank begins stacking the remaining 2 Infusers on the Crimson Knight in the center. Make sure to bash Infusers. Tank needs to be constantly blocking, unless the Crimson Knight enrages in which case they must roll dodge. Focus: Crimson Knight -> Infusers
3. Have the main tank taunt the Bitter Knight and a Infuser, have the off-tank taunt the remaining 3 infusers. One of the Infusers will be down the hill so make sure someone is there to bash. Delegate either healers or supports to be on interrupt duty. Stack in the left side of the tent to create a neat stack. The Crimson Knight will trigger Sanguine Blood on a player, make sure to destroy the red bubble around the player. Focus: Bitter Knight -> Infusers
4. Have both healers slot a taunt. It is highly recommended that DPS wear Balorgh and have 500 ultimate saved up. The goal is to stack all of the adds in between the small broken cart and the big broken cart. DPS will stack in front of the dead half tree where the bulwark spawns. Once the adds have all been stacked drop Elemental Rage, Aggressive Warhorn, Colossus, and all other damaging ultimates.
- One healer taunts the Infuser on the right side of the arena by an open gate. They will go to the stump on the left where the bulwark spawns and stack.
- The other healer taunts the Infuser on the Left side of the arena. They will go to the tree on the right side.
- Off Tank tanks the bulwark and the raider, to be safe leave them out of the stack, to be fast stack them as explained lower.
- Main Tank takes the Tidebreaker, Blood Knight, Shaman.
Focus: Shaman -> Blood Knight -> Infusers -> Tidebreaker -> Raider -> Bulwark -> Storm Caller
A few other tips:
- If you are learning, have the DPS stand back and have the healers and tank just practice pulling everything where they are supposed to be, having them die when necessary.
- This is an incredibly difficult pull, if you are strapped for time you can sneak behind the stables on the left side and kill the Storm Caller and then enter the boss room for Falgravn.
Lord FalgravnEdit
Hard ModeEdit
LayoutEdit
Kyne's Perch KeepEdit
.jpg)
This is the first area, and Thane Ogvar's safe haven. You'll land at the docks here when you travel by way of boat from the northern coast, or by using the wayshrine.
A letter addressed to Thane Ogvar can be found by a campfire in front of the barricade. Several crafting stations can be found just beyond the docks, including a cooking fire, as well as blacksmithing, clothing, woodworking, enchanting, alchemy and jewelry crafting stations.
Kyne's Perch VillageEdit

This is the first area with enemies.
Balgvir's Siege Journal lies upon a crate in front of the door leading to the hill that rises towards the boss room. A Half-Giant Storm Caller blocks the way between you and the first boss. The door to the next area cannot be opened until this enemy and its cronies are defeated.
Charred OverlookEdit
This is the third area, leading up the mountain. Yandir the Butcher and his Sea Adder can be found here.
Prospector's RangeEdit
The corpses of dead miners litter the ground here, being eaten by Harrowfiends.
Ruins of Kyne's AegisEdit


The ancient Nordic ruins at the northern portion of the island.
BooksEdit
- Balgvir's Siege Journal by Balgvir
- Letter to Thane Ogvar by Thunvilde — A letter describing historical encounters with Sea Giants
AchievementsEdit
There are 18 Achievements associated with this trial:
| Achievement | Points | Description | Reward | |
|---|---|---|---|---|
| Sea Giant Style Master | 50 | Learn every chapter in the Sea Giant style book, occasionally found as rewards for completing the Kyne's Aegis Trial. | ||
| Needed for Kyne's Deliverance | ||||
| Kyne's Deliverance | 50 | Complete the listed achievements for Kyne's Aegis. | Title: Dawnbringer Ritual Circle Totem |
|
| Kyne's Aegis Completed | 10 | Defeat Yandir the Butcher, Captain Vrol, and Lord Falgravn in Kyne's Aegis. | Title: Kyne's Chosen | |
| Kyne's Aegis Conqueror | 10 | Defeat Yandir the Butcher, Captain Vrol, and Lord Falgravn in Veteran Kyne's Aegis. | Title: Kyne's Will Skin: Seaborn Silver |
|
| Kyne's Aegis Sprinter | 50 | Defeat all enemies in addition to Yandir the Butcher, Captain Vrol, and Lord Falgravn in Veteran Kyne's Aegis within 35 minutes of entering Kyne's Perch village. | ||
| Kyne's Aegis Vanquisher | 50 | Defeat Yandir the Butcher, Captain Vrol, and Lord Falgravn after raising the challenge banner in Veteran Kyne's Aegis, in one run. | Title: Shield of the North | |
| Stainless Siege-breaker | 50 | Defeat Yandir the Butcher, Captain Vrol, and Lord Falgravn along with all their hostile followers after raising the challenge banner for all of them, without suffering a group member death, within 35 minutes of entering Kyne's Perch village in Veteran Kyne's Aegis. | Title: Kyne's Wrath | |
| Half-Giant Slayer | 10 | Defeat 100 half-giants in Veteran Kyne's Aegis. | ||
| Vampire Slayer | 10 | Defeat 175 vampires and harrowfiends in Veteran Kyne's Aegis. | ||
| Bile Breaker | 10 | Defeat Yandir the Butcher without any player spreading Chaurus Bile to another player in Veteran Kyne's Aegis. | ||
| Singular Siegecraft | 10 | Defeat Captain Vrol while only repairing one of the two available ballistae in Veteran Kyne's Aegis. | ||
| Deepest Gratitude | 10 | Successfully rescue all prisoners held captive by Lord Falgravn in Veteran Kyne's Aegis. | ||
| Lightning Leaper | 10 | Defeat Yandir the Butcher, Captain Vrol, and Lord Falgravn in Veteran Kyne's Aegis without ever being struck by Lightning Bolt. | ||
| Stone-hearted Slayer | 10 | Allow all eight prisoners to die before defeating Lord Falgravn in Veteran Kyne's Aegis. | ||
| Spare the Servants | 10 | Defeat Lord Falgravn while Lieutenant Njordal is alive in Veteran Kyne's Aegis. | ||
| Veteran | ||||
| Down with the Ship | 15 | Defeat Captain Vrol after raising the challenge banner in Veteran Kyne's Aegis. | ||
| Meatgrinder | 15 | Defeat Yandir the Butcher after raising the challenge banner in Veteran Kyne's Aegis. | ||
| Perfect Storm | 50 | Defeat all enemies in addition to Yandir the Butcher, Captain Vrol, and Lord Falgravn without suffering a group member death in Veteran Kyne's Aegis. | ||
NotesEdit
- This trial is commonly abbreviated as "KA".
- Kyne's Aegis exists in Skyrim, but as an unmarked island with two gold ore veins, as confirmed during the ESO Live announcement stream. It has no ruins, except for a skeleton clutching a flagpole at the peak of the island. The trial was based on this island (its gold mining history inspired by the ore veins) and it was retroactively named Kyne's Aegis.
- This unmarked island appears a second time in ESO in the Western Skyrim zone, west of Northern Watch Ritual Site, in the same location as it was in Skyrim.
BugsEdit
- The map marker for Kyne's Aegis will show up as available and give the prompt to teleport even to players who don't own Greymoor, unlike trials for other unowned content (i.e. Sunspire) which will immediately direct players who don't own the content to the Crown Store. If one who doesn't have Greymoor tries to teleport to it, only then will they be given the "Locked Content" notice.
MapsEdit


SetsEdit
| Set Name | Bonuses | Armor Weight |
|---|---|---|
| Kyne's Wind |
2 items: Adds 3-129 Magicka Recovery |
Light Armor |
| Perfected Kyne's Wind |
2 items: Adds 3-129 Magicka Recovery |
Light Armor |
| Roaring Opportunist |
2 items: Adds 34-1487 Offensive Penetration |
Light Armor |
| Perfected Roaring Opportunist |
2 items: Adds 34-1487 Offensive Penetration |
Light Armor |
| Vrol's Command |
2 items: Adds 25-1096 Maximum Stamina |
Heavy Armor |
| Perfected Vrol's Command |
2 items: Adds 25-1096 Maximum Stamina |
Heavy Armor |
| Yandir's Might |
2 items: Adds 3-129 Weapon and Spell Damage |
Medium Armor |
| Perfected Yandir's Might |
2 items: Adds 3-129 Weapon and Spell Damage |
Medium Armor |
GalleryEdit
-

Landscape of Kyne's Aegis
-
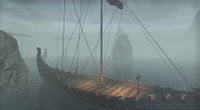
Captain Vrol's longship
-
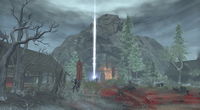
Entrance to the Dragon Cult ruins
-

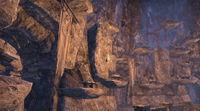
Looking up through several layers of the ruins in the wake of Falgravn's destruction
-
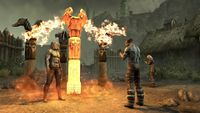
Banners in the final boss chamber
-
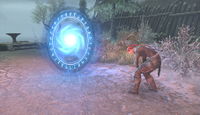
Portal
-
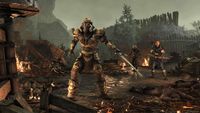
Kyne's Aegis render
-
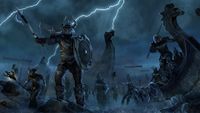
Sea Giants render
-
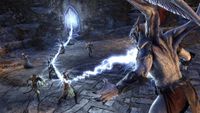
Fighting Lord Falgravn render
-
Kyne's Aegis Trial Rewards render


